To sign up, head over to the Sign up page.
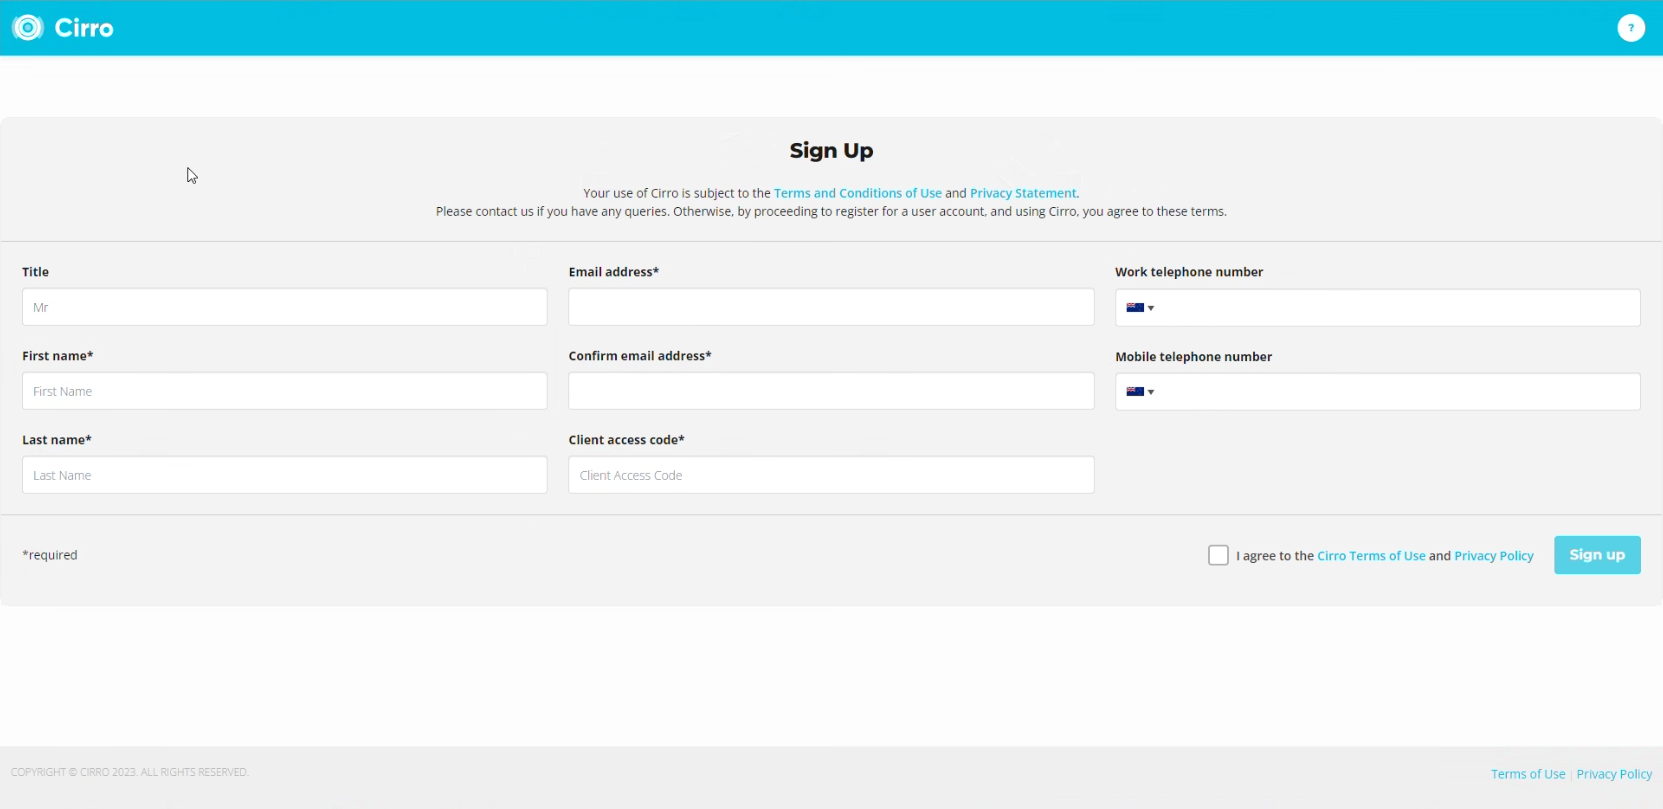
With your invitation to Cirro you should have received a 12-digit client access code, this code is specific to each client, and you will need it to access that Client Space and its projects. Enter this code in the relevant field, as well as any project(s) you wish to gain access to, this will let admins know which projects to grant access to.
If you would like to receive SMS notifications for your project, be sure to add your mobile number.
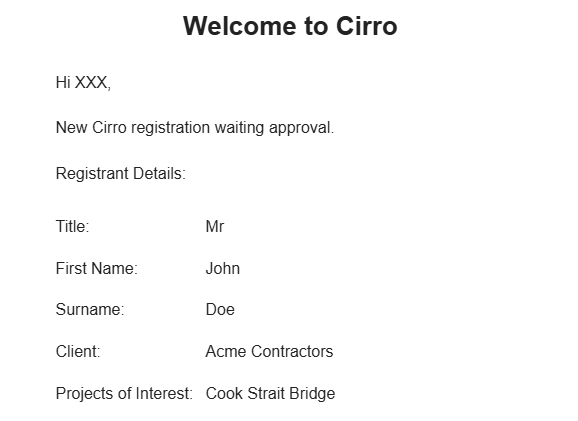
Upon completing signup, you should receive an email stating that your registration is pending approval.
If your company/client space has a “Client” permission level user, they can approve your registration, alternatively, a Cirro admin will approve and grant access to your project(s).
Once your access has been approved, log back in. You should be taken to your project dashboard.
Approving New User Registrations
1. Who Can Approve Users
User registrations can be approved by any of the following:
- Client-level users within the Client Space the new user registered under.
- Cirro staff with global administration permissions.
Only these users will receive an email notification when someone registers using that Client Space’s access code.
2. Overview
When a new user registers with Cirro, they are automatically assigned to the Client Space associated with the access code they entered.
All Client-level users and Cirro staff for that Client Space will receive an email notification with the new user’s details and information that a registration is pending approval.
The notification also includes a "Projects of Interest" field, which helps identify which projects the user has requested access to when multiple projects exist within the same Client Space.
3. Approving a User
Log In to Cirro
Log in to your Cirro account. If you have access to multiple Client Spaces, use the drop-down menu under your initials in the top-right corner of the page to switch between them.
Access the Users Page
Go to Organisation Settings > Users.
Find the Pending User
Locate the user you want to approve. Their role will be listed as "Register".
You can use the Role filter to quickly find all users waiting for approval.
Edit Roles
Click the Edit Roles button on the right-hand side of the user’s entry.
Assign the Appropriate Role
Use the Role dropdown to select the correct permission level:
- Client – Admin-level users with access to all projects within the Client Space.
- Project – Users who should have access to specific projects.
- Datalogger – Users who should have access only to certain devices within a project.
Set Project and Device Access
- For Project-level users, select the project(s) they should be able to access.
- For Datalogger-level users, select both the project and specific devices they are permitted to view.
Add Additional Roles (Optional)
If required, multiple roles can be assigned. For example, a user might have Project-level access for several projects and Datalogger-level access for another.
Important Note
Before approving any user, always verify their identity and ensure they are authorized to access the data, projects, or devices they are being granted permission for.