The Cirro reporting feature allows you to create, edit, and publish structured reports for your projects using reusable templates. This guide explains the workflow for using templates, generating reports, and managing publication.
Accessing Reports
- Navigate to your project in Cirro.
- Click on the Reporting page.
- Here you will find all report templates and generated reports for your project:
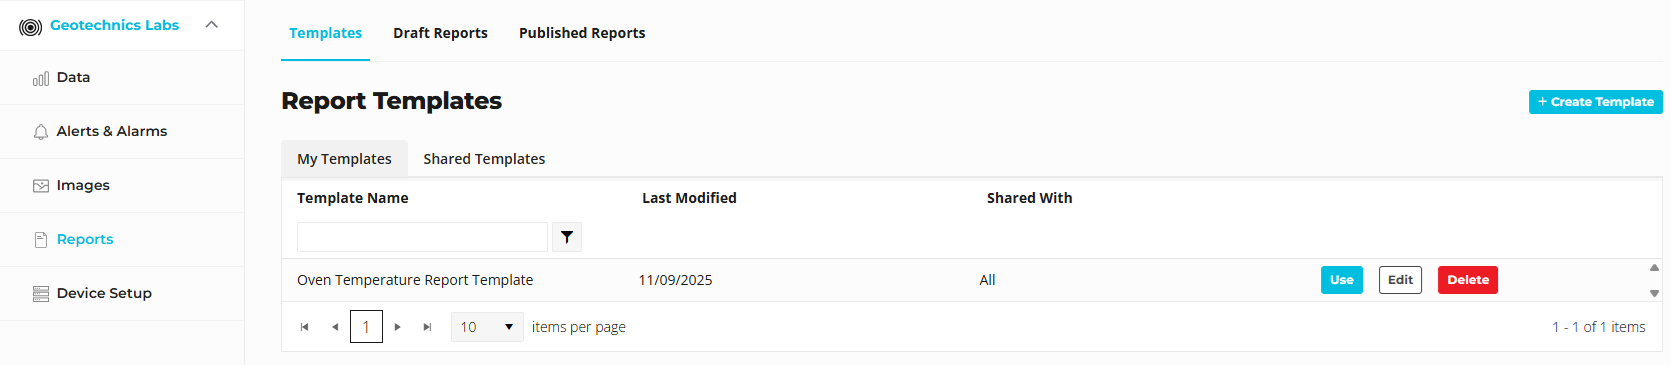

Report Templates
What is a Template?
A template provides a reusable structure for your reports. Templates include:
- Graph placeholders ready to load the latest data (e.g., last 7 days)
- Headings and layout
- Other reusable elements
Templates do not need to include unique report content like commentary. This should be added when generating a report as it is likely to change for each report.
Creating a Template
- From the Templates page:
- Click +Create Template. or Edit an existing Template.
- Add details for each graph or section.
- TIP: Keep commentary in templates generic, specific commentary or descriptions can be updated later for each report.
- You can add images, but currently only via external links (e.g., upload to an image hosting platform, then paste the link).
- Use the available editing tools:
- Basic text formatting (bold, italics, lists, etc.)
- Copy and paste from MS Word (most formatting is retained)
- Insert graphs from your existing favourites via the Insert Graph option.
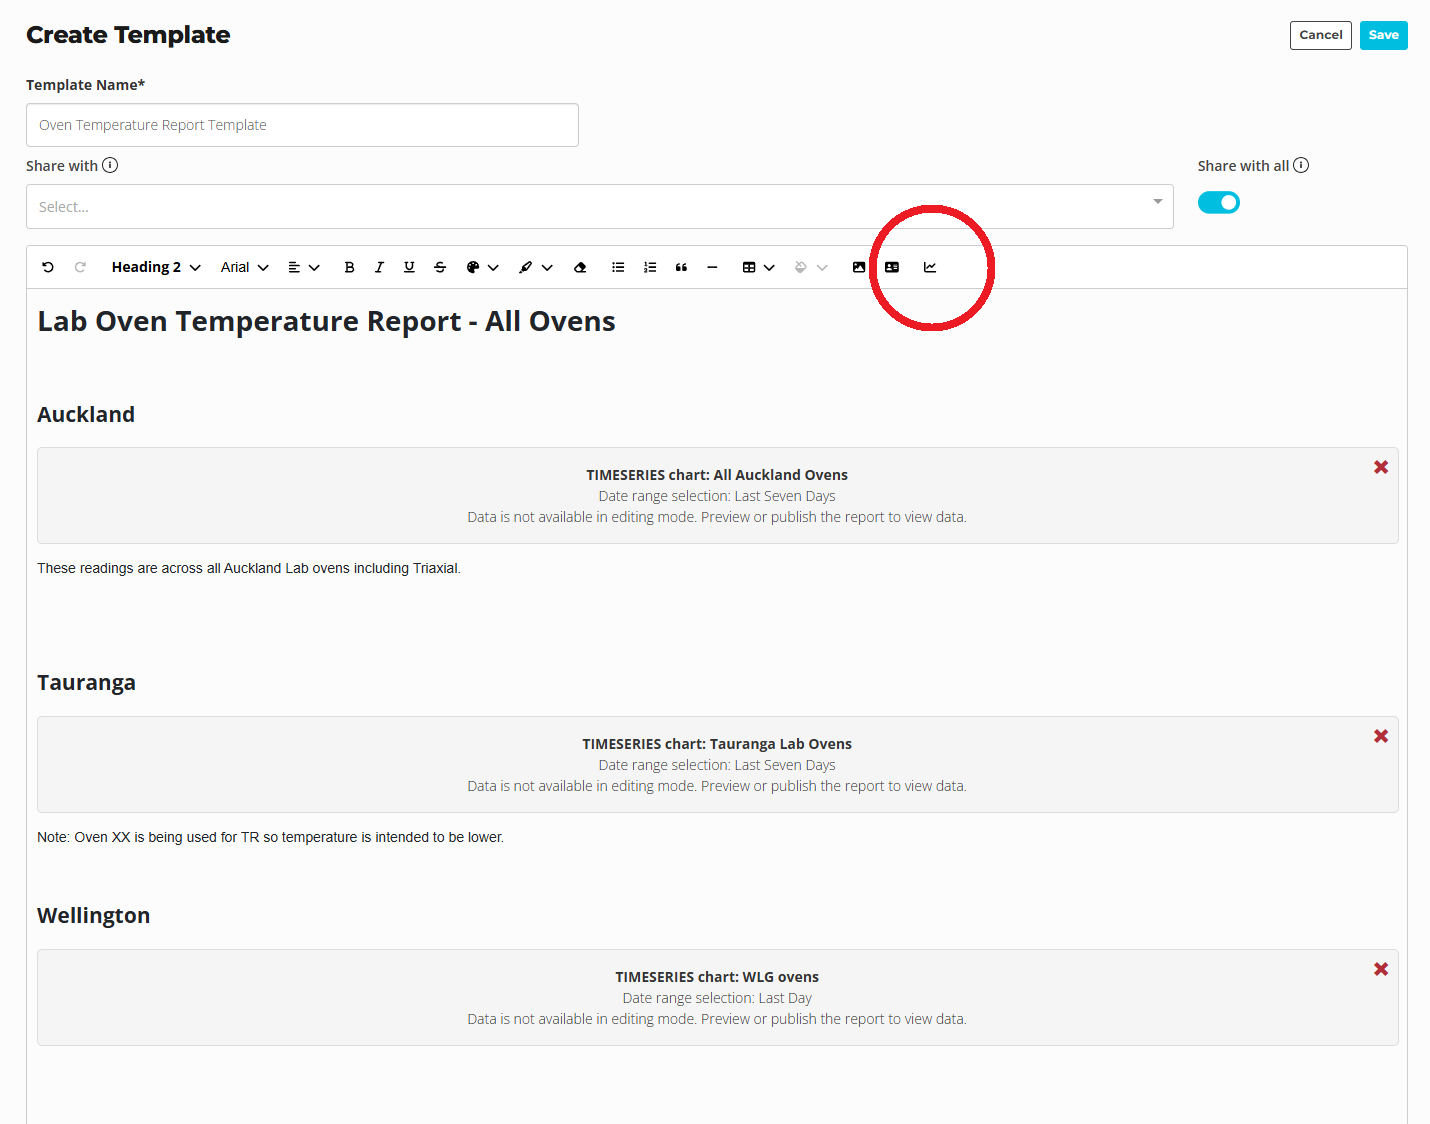

Headings
- Heading 1 and Heading 2 will appear as navigable headings in the published report (e.g., top-left menu).
Saving a Template
- After editing, click Save Template.
- Templates can be shared with colleagues so they can also generate reports from them. Click "Share with all" if you want the template visible to other project users.
Creating a Report
- From the Templates page, click Use Template on the desired template.
- Enter report-specific details (commentary, notes, images).
- Set the Publish Date:
- Graphs will display data up to this date (e.g., a 7-day graph will show the 7 days preceding the publish date).
- Click Preview to see how the report will look.
- Note: Graphs do not render in edit mode.
- Save your draft.
Review Process
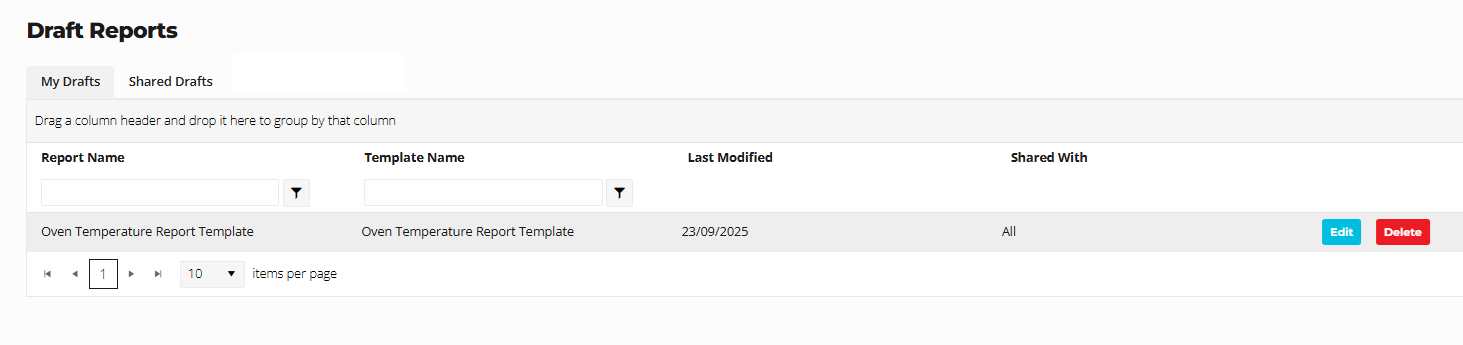
- Drafts can be shared with colleagues for review.
- Colleagues can only view draft reports if the original template is shared with them.
- Use the Draft Reports page to manage reviews.\\
Publishing a Report
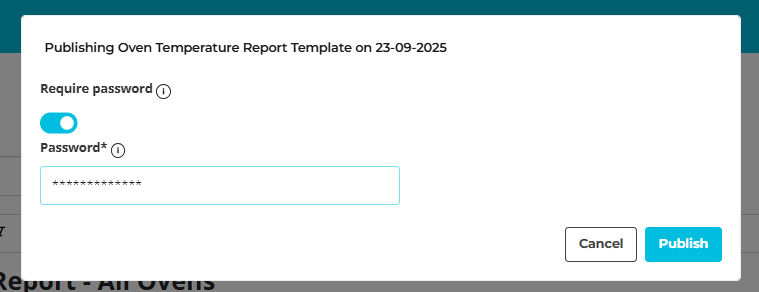
- Click Publish once the report is finalized.
- Optionally, set a password to restrict access.
- This is useful if the report link is shared outside of your organisation
- Password is not required to view a report if the user already has cirro access
- Published reports are accessible to authorised users and can be referenced in project communications.
Tips & Best Practices
- Keep commentary blank in templates to ensure reports are updated week-to-week.
- Use headings consistently for better navigation.
Scheduling Reports
Cirro allows you to automatically generate and email reports from a report template on a recurring schedule.
Setting Up a Schedule
- From the Templates page, find the template you want to schedule.
- Click Schedule on the template.
- Configure the schedule and email settings in the Schedule Reports window.
💡 Note: Each scheduled send publishes a new report using the template's current content. Changes made to the template will therefore be reflected in future scheduled reports.
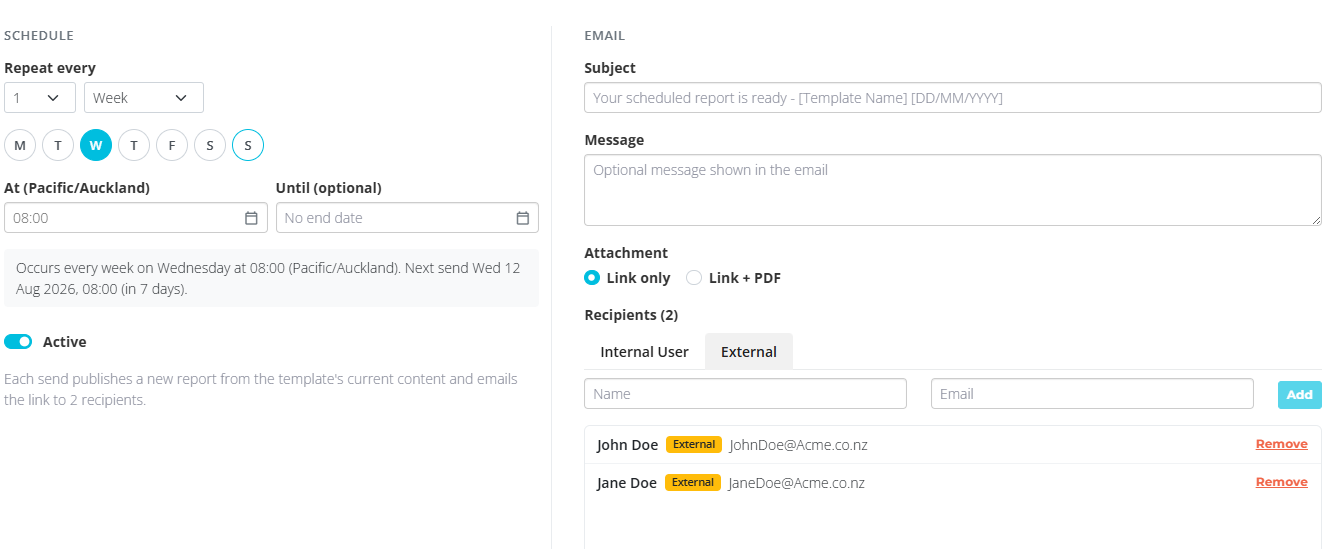
Schedule
Choose how often the report should be generated and sent:
- Daily – Send the report every day at the selected time.
- Weekly – Select the day(s) of the week and time the report should be sent.
- Monthly – Set the report to occur on a recurring monthly schedule.
- Set the schedule to repeat at the required interval (e.g. every 1 week).
The schedule can be paused at any time by switching Active off.
Pausing a schedule does not remove its settings, so it can be reactivated later without needing to configure it again.
Subject
Enter a custom email subject, or leave the field blank to use the default subject.
Message
Add an optional message to the email. This can be used to provide additional context or an explanation for the recipient(s).
Attachment
Choose how the report is delivered:
- Link only – Recipients receive a link to the interactive HTML report.
- Link + PDF – Recipients receive the interactive report link as well as a PDF copy of the report.
The interactive HTML report allows recipients to interact with graphs and data, including:
- Zooming in and out of plots
- Hovering over data points to see exact values
- Interacting with dynamic graphs and other report elements
The PDF is a static version of the report and does not provide these interactive features. However, PDF reports may be preferred by some clients for their reporting and record-keeping requirements.
Recipients
Recipients can be added as either Internal Users or External recipients.
Internal Users
Internal users are people who have a Cirro login and access to the project.
- Select the Internal User tab.
- Start typing the user's name.
- Select the user from the search results.
- Click Add.
The selected user will be added to the recipient list.
External Recipients
External recipients do not need a Cirro login.
- Select the External tab.
- Enter the recipient's name and email address.
- Click Add.
The recipient will then be added to the email list.
Saving the Schedule
Once the schedule, email settings, attachments, and recipients have been configured:
- Click Save to save the schedule and remain in the scheduling window.
- Click Save & Close to save the schedule and return to the previous page.
Once saved, Cirro will automatically generate the report from the template according to the configured schedule and email it to the selected recipients.